Wednesday, December 26, 2012

Backup iPhone SMS

Many colleagues and friends of mine have been asking me a simple question: How to backup iPhone SMS messages? Rudimentary this question might be; however, there is no direct way to backup your iPhone SMS messages to your computer in a user-friendly way.

Using standalone utilities for iPhone SMS backup

I have found no single tool to be doing the job perfectly, however the below PC program closes in to what one genuinely needs on a daily basis in order to backup SMS text messages to one's computer:

http://www.copytrans.net/copytranscontacts-notes-sms.php

1. In order to export and backup your iPhone SMS, download and run the above utility; then, connect your iPhone to your computer. Your iPhone SMS messages will now be displayed after you click on the iPhone SMS icon on the far right of the program window

2. Follow the directions in this video, or continue with the steps below:


3. Now select the iPhone SMS to backup and click Export selected

4. Select the location on your computer where to backup your iPhone SMS

5. The iPhone SMS you selected is now saved to a folder on your PC into HTML files. You can see that I have exported all my iPhone SMS messages in this way

6. You can now freely access and interact with your iPhone SMS backed-up in this way on your computer

What I’d like to see this utility do is also to help me delete my text-messages from my iPhone all at once. I hope this feature will follow with a future release.

Backing up your iPhone SMS via iTunes or the iCloud

Another way to backup iPhone SMS messages is via iTunes sync. iTunes will backup your iPhone SMS, emails, and contacts along with your iPhone settings when syncing with your iPhone.

The caveat is that you can never access your iPhone SMS backup made via iTunes on your PC. In order to see your backed up iPhone SMS messages, you would need to restore your iPhone from the backup made by iTunes which will also restore your iPhone settings, contacts and other data at the time when the backup was made.

Backing-up iPhone messages with iCloud works in the same way as backing-up with iTunes. You can enable automatic iCloud backup on your iPhone by navigating to Settings > iCloud > Storage & Backup and enable iCloud Backup.

I hope I have been helpful and you will now find it easier to backup iPhone SMS to your computer in a more user-friendly way.

Thursday, December 13, 2012

Official Google Maps app: Out for iPhone

Apple has finally approved a Google-produced Maps app for the iPhone 5, iPhone 4S, iPhone 4 and 3GS as well as for the iPod Touch. You can already download the official Google Maps app from the iTunes store.

With iOS 6, Apple decided to reinvent their Maps app by scrapping the map services offered by Google and replacing them with their own. The revamped Apple Maps iPhone app did not cater to the expectations of many and some even found it disappointing due to numerous incorrectitudes and other issues compared with the service provided by Google Maps.

With users who updated to iOS 6 finding no way to revert back to the Google Maps service which the official Maps iPhone app offered in previous iOS versions, Google initially remained silent on any prospects of developing their own native Google Maps iOS app.

However, it was clear that Google was cooking a Maps app of their own and on September 12th it was unofficially rumored that Google submitted their Maps app to Apple for approval.

At last, Google Maps iPhone app was just officially approved by Apple for the iPhone – possibly an iPad app will also follow soon.

At first sight the new Google Maps app looks revamped, yet it features a simple interface. The Maps app gives you a chance to log in with your Google account but you can skip this step.

The satellite map imagery is as outstanding as Google could make it.

You also have the old Traffic and Public transit features we know from the original Maps app.

Here is how the app looks on my iPad Mini. Obviously, the Google Maps app is still available only for the iPhone, at least in the beginning.

Finally, here is a YouTube video from New York Times revuewing the newly-approved official Goolge Maps app.

Thursday, December 6, 2012

Add events to iPhone calendar

This quick post explains how to add events to your iPhone calendar directly from your iDevice.

If you would like to manage and add events to your iPhone calendar directly from your computer, then have a look at this quick guide instead: How to add calendar events to iPhone?

There are various methods in which you can manage calendars and calendar events on your iPhone. The mainstream way is to do so directly on your iPhone. However, some people find this method of using their iPhone calendar limited due to the small iPhone screen and virtual tap-keyboard.

Here is a short YouTube video quickly showning how to add events to your iPhone calendar from your PC:


Adding event entries to iPhone calendar from within your iPhone

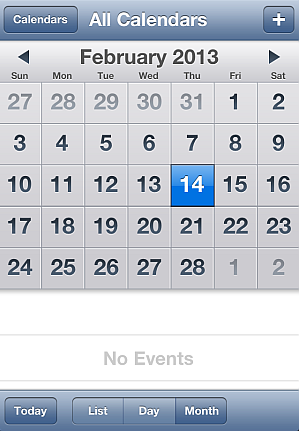
In order to add an event to your iPhone calendar, simply tap on Calendar from the Home Screen. Next, tab the day on which you want to add the iPhone calendar event and click on the "+" button.

Now, add your iPhone calendar event title, location and information about beginning and ending time. You can also set alerts for your iPhone calendar events prior to the time they occur. Tap on Done.

The newly-added event on your calendar will appear directly on your iPhone.

Wednesday, October 31, 2012

PC: Transfer iPhone notes

Have you ever needed to transfer your iPhone notes to your computer? Here’s a quick guide about how to transfer iPhone notes to your PC.

There aren’t too many ways in which you can copy notes from your iPhone using what’s already on your device.

iPhone notes transfer directly to computer

You can export your iPhone notes via using a third-party tool such as the one below:

To do so, simply download and run the above program on your Windows PC and connect your iPhone to your computer. You can follow the directions from the YouTube video below or continue reading on for the detailed steps.

Related article: Transfer "On My iPhone" notes to iCloud

Your iPhone notes will appear in the main program window as shown.

Before you transfer your notes from your iPhone to your PC, you can view and edit them directly on from the program window.

Now, transfer your iPhone notes to your computer, simply by selecting all notes and clicking on the “Export selected” button. Then navigate to the location on your PC where you want the iPhone notes transferred to.

Your iPhone notes will now be copied directly to your PC. You can now open your iPhone notes on your computer and read, edit or print at your convenience.

You will also be able to import any TXT or HTML file from your PC to your iPhone using the method above.

This is how you export iPhone notes directly your computer.


Transferring iPhone notes via iCloud

Note: This method requires iOS 5 + and an @me.com email account

Since not too long ago, iCloud has made Apple users happy by allowing them to sync and transfer much of their iPhone data such as contacts, reminders, and bookmarks. iCloud also features iPhone notes transfer and sync.

You can easily transfer your iPhone notes to your computer using iCloud. To do so:

1. Enable iCloud Notes sync on your iPhone by going to Settings > iCloud and then moving the “Notes” from to ON


2. In order to enable iPhone notes sync with your iCloud account, you need an @me.com email account. If you haven’t set up an @me.com email address yet, your iPhone will guide you through the steps of creating one


3. All notes on your iPhone you create from the moment you enabled Notes sync will now transfer to your iCloud account. Note that notes created on your iPhone before you enabled iPhone Notes sync with iCloud will not be transferred

4. On you computer, log in to your iCloud account via a regular web browser by navigating to:


5. Click on the “Notes” icon. You will now see your new iPhone notes transferred to your iCloud account


6. You can also send your iPhone note as an email by clicking on the envelope icon at the bottom of the note


This is a simple way to transfer iPhone notes and display them on your computer. If you would like to save your iPhone notes offline directly to your PC use the first method above using the transfer iPhone notes tool.

Thursday, October 11, 2012

How to delete all contacts on iPhone?

There are a number of ways to delete all iPhone contacts. Which one you choose depends on what you want to achieve. This article describes three quick methods of deleting multiple contacts from your iPhone.

Deleting contacts directly from your iPhone

If your contact list is not extensive, you can delete your address book by deleting your contacts directly on your iPhone. To do so:

1. Launch the Contacts app

2. Select a contact

3. Tap “Edit”

4. Now navigate to the bottom of your contact and tap “Delete Contact”

remove multiple iphone contact

Of course, if you have a contact list exceeding 100 entries, this method of removing iPhone contacts will take some time. If you have a large iPhone address book, it is recommended that you use one of the methods below in order to delete multiple iPhone contacts at once.


Deleting contacts directly from your iPhone

A quicker and easier method to remove multiple or all iPhone contacts at once is by using a standalone application such as CopyTrans Contacts.

1. Download the tool from here:

delete all iphone contacts at once

2. Open the app on your computer and connect your iPhone

Next, follow these video instructions or continue with Step 3 below:


3. All iPhone contacts will instantly appear in the program’s main window. Now select all contacts, right-click and select “Delete contacts”

delete all iphone contact

4. You have now managed to delete all contacts from your iPhone in one go.


Delete all iCloud and Exchange contacts from your iPhone at once

If you have your iPhone contacts synced with iCloud or to your email account via Exchange, there is another easy way to remove all iPhone contacts at once.

1. On your iPhone, navigate to “Settings > Mail, Contacts, Calendars” and click on iCloud (or Exchange depending on where you sync your iPhone contacts)

2. Now make sure you move the slider next to “Contacts” from ON to OFF. Upon prompt, tap on the “Delete from my iPhone” button

delete all contacts on iphone

This will delete all contacts on your iPhone which were currently synced to iCloud or your email account.

Friday, September 28, 2012

CopyTrans Contacts for USD 1.99 until Sunday

Here is a deal from the producers of the iPhone contact app. Until midnight Pacific Daylight Time, Sunday, October 7th their program allowing easy transfer/adding/removing and editing iPhone contacts will be priced at USD 1.99 instead of its regular price of USD 9.99

To find out more about the offer, navigate directly to the app's page: Copy iPhone Contacts

Thursday, August 2, 2012

How to import multiple vcards into Outlook

There has been a lot of said and done about this issue, but fact is Outlook would still not allow you to import multiple vCards: yes, even with version 2010. I found this especially disturbing when I attempted to import my iPhone contacts to Outlook. All I could do was to import the vCard files I exported from my iPhone to my PC one by one : try that for 500 contacts!

However, using a 3rd party tool to export my iPhone contacts, I found a quicker method to import multiple vCard contacts into Outlook for free using your iPhone.

1. Have your iPhone ready, download and run the following app:

Next, connect your iPhone to your computer and import all of your vCard files from your computer to your iPhone by dragging/dropping the entries directly to the main program window

Note: to set the newly imported contacts from the contacts you already have on your iPhone, you can create a new contact group on your iPhone and drag/drop the vCard entries there. To set up a new group using the Contacts program, click on the “+” sign in the Groups pane

You can later delete the newly-imported contact entries if you wish to.

2. Now that all the information from the vCard entries has been successfully loaded to your iPhone in the form of iPhone contacts, select all the iPhone contact entries originating from your vCard files and hit the “Export selected” button

Continue following the steps under, or watch the below YouTube video tutorial to see the steps in action:


3. From the new window, click “Outlook (direct export to Outlook)”

4. The program will now directly import your selected iPhone contacts to Outlook on your computer. Select the folder location on your Outlook where you want the contacts imported – this will be your default Outlook Contacts folder. Click OK

5. Your multiple iPhone contacts have now been imported to Outlook on your computer with all contact details present in the original multiple vCard contact files


This was a quick and easy method to import multiple vCard contacts to Outlook on your computer using nothing but your iPhone and a powerful app to import the vCards to your iPhone and then transfer the iPhone contacts to Outlook.

Monday, July 9, 2012

How to delete multiple iPhone contacts at once?

There is currently no way to delete multiple iPhone contacts at once from within your iPhone. However, there is a quick way to delete several contacts at once from your iPhone using CopyTrans Contacts. Have a look at the short video below:


Monday, June 18, 2012

How to export iPhone contacts?

Been wondering how to export iPhone contacts to PC or anther iPhone? Check the YouTube video below:


Tuesday, June 12, 2012

Import contacts to iPhone

I had been looking for an easy way to import contacts to iPhone and after months of fruitless search, I have found the method described below as useful and quickest.

Requirements:

1. Locate where your contact entries are loaded on your PC

2. Download and run an app named CopyTrans Contacts from the link above, connect your iPhone. Your current iPhone contacts will appear in the program window


3. Drag and drop the contacts from the folder on your PC to the program’s main window. This will import contacts to iPhone directly

4. You can now see the newly imported contacts to iPhone via the program main window

To double-check, you can go to your iPhone and see the contact list. Contacts have been imported to iPhone successfully.

This is how to import contacts to iPhone from computer in 4 quick steps.


Friday, April 13, 2012

iCloud contacts not syncing

Newly created iPhone contacts not syncing to iCloud is an issue to which I recently came across and it was driving me mad.

Note: Before finding the solution, I looked for ways go around this and to keep a backup copy of my iPhone contacts directly on my computer in case iCloud continues to fail. As a result, I found a neat alternative way to export iPhone contacts instead.


The Problem:

If you google “iCloud contacts not syncing” or “iphone contact sync” there are numerous posts, including Apple Support Community ones which all talk about rebuilding your address book.

My problem however, was different – simply, newly created iPhone contacts will not sync to iCloud despite having enabled iCloud sync. The solution to this rather simple, but few people know about it and Apple is not very helpful in clarifying the way out.

UPDATE for iOS 7 users: there is a detailed article for causes of iPhone contacts not syncing and disappearing which you may find useful:

http://goo.gl/KfqfO7

How to solve iCloud-contacts-not-syncing problem in 3 easy steps:

1. On your iPhone, navigate to Settings > Mail, Contacts, Calendar

2. Under Contacts, make sure you set the Default Account to iCloud

3. Now your new iPhone contacts will sync normally with your iCloud account

What causes iCloud contacts not syncing?

If you have enabled iPhone contact sync via both the iCloud and a third-party account such as your Gmail/Yahoo/etc. (via Exchange), your iPhone will have to decide to which of the two accounts newly created iPhone contacts are added.

It is your email account that your new iPhone contacts were synced with and not your iCloud account. Changing the Default-account option as the steps above indicate, will set iPhone contacts created outside of a specific account to be synced with your iCloud instead.

It is always recommended to keep a backup of your iPhone contacts at a safe offline location in case you misplace some or all of your contact list. You can use a number of apps to easily backup iPhone contacts to your PC.

To prevent messing up with your iPhone contacts list via using the iCloud, have a look at the video below which quickly shows how to export and backup iPhone cotnacts to your computer before syncing with iCloud: